A standby generator is the most reliable form of backup power available for residential use. Unlike portable generators that require manual setup, fuel management, and careful carbon monoxide precautions, a standby unit is permanently installed beside your home, connected to an automatic transfer switch (ATS) at your panel, and fueled by natural gas or propane. When utility power fails — whether at 2 AM during a hurricane or during a weekday business call — the generator starts automatically within 10–30 seconds without any human intervention. The appeal is obvious. The complexity is also real: installation involves electrical work, gas work, concrete or gravel pad preparation, permit coordination with multiple agencies, and in some cases utility notification. This guide covers the complete installation process, from sizing and fuel selection through final commissioning.
Step One: Sizing Your Generator Correctly
Generator sizing starts with a load calculation — inventorying the electrical loads you want the generator to support and calculating their starting and running wattage requirements. Motor-driven loads (central AC compressors, well pumps, sump pumps, refrigerators) draw 2–3 times their running wattage at startup, which is the critical design constraint. A 5-ton central AC unit, for example, may run at 5,000 watts but draw 15,000 watts for 2–3 seconds at startup. Your generator must handle that startup surge without shutting down. Common sizing targets for standby generators: 10–14 kW handles essential circuits including one AC unit, refrigerator, lights, and outlets; 16–22 kW handles most of the home including central AC and most appliances; 24–32 kW provides whole-home coverage including electric range, multiple AC zones, and EV charger; 40+ kW covers large homes with heavy electrical loads. The only accurate way to size is a load calculation performed by your electrician. Over-sizing wastes money; under-sizing means the generator shuts down on overload during the storm you needed it for most. Get the sizing right before purchasing.
Fuel Options: Natural Gas vs. Propane
Natural gas: if your home already has natural gas service, a natural gas standby generator is the most convenient choice. The generator connects to your existing gas line (sized appropriately — larger generators require larger gas line supply), runs indefinitely without any fuel management, and costs nothing in fuel between outages (you only pay for gas when the generator runs). The main risk: if a major disaster damages gas infrastructure (earthquakes in California, flooding in coastal areas), your generator loses fuel simultaneously with losing power — the scenario where you need backup power most. Natural gas also requires your gas meter and service pressure to meet the generator's BTU demand, which may require a gas line upgrade in some cases. Propane: required for rural properties without natural gas service. Propane stores indefinitely in above-ground tanks (250–1,000 gallon residential sizes) and provides fuel independence from gas infrastructure damage. Costs: propane tank rental $75–$200 per year, plus $1.50–$3.00/gallon for propane (prices vary). A 22 kW generator burns approximately 2.5–3 gallons of propane per hour under load; a 500-gallon tank provides roughly 165 hours of runtime at full load. For extended outages (Hurricane Ida caused 2-week outages in Louisiana), propane storage calculation matters.
Automatic Transfer Switch vs Manual Transfer Switch
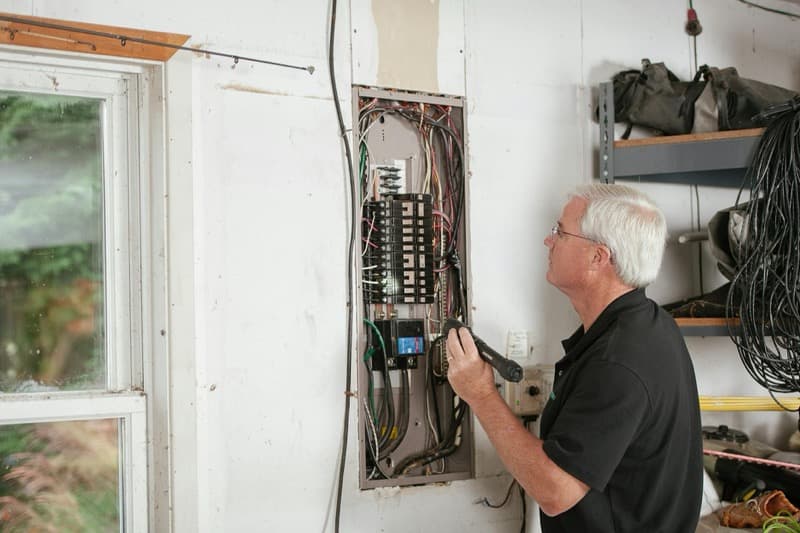
The transfer switch is the critical safety component that connects your generator to your home's electrical system while preventing dangerous backfeed onto utility lines. Automatic Transfer Switch (ATS): the industry standard for standby generators. The ATS is wired between your utility meter and your main electrical panel. It continuously monitors utility voltage. When voltage drops below threshold (power outage), it signals the generator to start and, after the generator is running at stable voltage and frequency (typically 10–20 seconds), transfers your home's circuits from utility to generator. When utility power returns and is stable, the ATS transfers back automatically and shuts down the generator. The entire process is hands-off. ATS units typically cover either the whole panel or a subset of selected circuits (called a load center or critical loads panel). Whole-panel ATS: covers all circuits in your home — most comprehensive and preferred for whole-home generators. Load center ATS: a separate sub-panel containing only selected critical circuits (refrigerator, lights, some outlets, furnace, sump pump) that is covered by the ATS while the rest of the home remains on utility. More affordable but requires selecting circuits in advance and provides only partial coverage. Manual Transfer Switch (MTS): requires you to manually start the generator, wait for it to stabilize, and flip the transfer switch. Used primarily with portable generators. Not appropriate for unattended standby applications.
The Installation Process: Day by Day
A standard standby generator installation for a properly prepared site typically takes 1–3 days. Day one (electrical rough-in): the licensed electrician installs the ATS at or near your main panel, runs conduit from the ATS to the planned generator location, and begins the ATS wiring. In some installations, this is a full day of work. Day two (generator placement, gas connection, concrete work): the generator is set on its pad (concrete, compacted gravel, or prefabricated generator pad — some manufacturers include a plastic/fiberglass base pad with their units), the gas line connection is made by the licensed plumber or gas-certified electrician, the weatherproof conduit from the ATS is connected to the generator, and all grounding connections are made. Day three (startup, testing, permit close-out): the generator is started for the first time, the ATS is tested by simulating a power outage, the generator is exercised through all load conditions, the permit inspector visits and signs off, and the homeowner is walked through operation and maintenance procedures. Most installations are complete in 2 days for a straightforward site (existing gas line, clear generator placement, nearby panel). Three days are needed when gas line extension is substantial, when the ATS requires significant panel work, or when permit scheduling delays the inspection.
- Generator unit (18 kW Generac): $3,500–$5,000 equipment cost
- Automatic Transfer Switch (whole-panel): $600–$1,200 installed
- Concrete or gravel pad: $200–$800
- Gas line extension (if needed, per foot): $25–$50/linear foot
- Permits (electrical + gas + building): $200–$600 total
- Electrician labor (2–3 days): $1,500–$3,500
- Gas plumber/pipefitter: $500–$1,500 depending on gas line work
- Total installed (18–22 kW, natural gas, standard site): $8,000–$15,000
Generac vs. Kohler vs. Cummins: Generac holds approximately 70% of the residential standby market and has the largest dealer and service network. Kohler is the premium choice — slightly higher cost, excellent build quality, and 5-year warranty versus Generac's 5-year warranty (comparable). Cummins (formerly Onan) is strong in the commercial and heavy-duty residential space. For most homeowners, a Generac is the practical choice because of parts availability and the density of trained service technicians. In markets where Generac dealers are scarce, Kohler or Briggs & Stratton are strong alternatives.
Permit Requirements and HOA Considerations
Standby generator installation requires multiple permits in most jurisdictions: an electrical permit for the ATS and panel work, a gas permit for the gas line connection, and sometimes a building permit for the concrete pad or permanent structure. In addition, many utilities require notification of generator installations connected to their distribution lines via transfer switches. The electrician typically handles all permits and utility notification. HOA considerations: generators are typically installed beside the home, often on a side yard. Many HOAs restrict generator placement and noise levels. Some require approval before installation and may require screening (fence or landscaping) to obscure the unit from street view. Check your HOA CC&Rs before purchasing — a denied HOA application after purchasing a generator is an expensive mistake. Generator noise level is specified in decibels on the manufacturer data sheet; Generac's residential units typically run at 66–69 dB at 23 feet, comparable to a central air conditioner.